Over the past few years I have made two quilts using one fabric and one block. I am pretty sure that I wouldn’t have been able to replicate the kaleidoscopes of either of these quilts. In short, you take about 5 yards of fabric, cut it into little triangles, and then sew it all back together. Insanity? Possibly- depending if you are talking to a quilter or not.
Now I have been tasked, from a local quilt shop here in Juneau- Raintree Quilting, to teach a class on how to do this with a panel. There are some beautiful examples on Pinterest or by searching Google for “One Block Wonders Panel Quilts”.
I would like to take you along on this journey with me.
For directions on the general principles of making a One Block Wonders quilt, there are some great books. My favorite is One Block Wonders: One Fabric, One Block, One-of-a-Kind Quilts. It walks you through how to choose fabric, what types of fabric to choose, and how to create a masterpiece (I’m not kidding, these quilts are spectacular). There are two variations you can choose from; I am going to follow the directions for a hexagon. The hexagon only requires 6 panels for the blocks and 1 panel for the center. The octagon version calls for 8 panels for the blocks and 1 panel for the center.

The first step is to align the fabric. What this means is that you need to make sure all layers of fabric are lined up exactly. This sounds much harder than it really is. What I did was to use a pin, find an exact point that I could poke the through for all the layers. For instance, I used the point to a triangle, or the tip of a nose or tail, and the corners of the borders- to name a few. I started on the layer on the bottom and poked the pin up from the wrong side. This sounds a bit difficult, but later you will see why it works best. So as I worked, starting from one end, I tried to find matching points about every 10 inches apart. Some videos I have seen say you only need six or eight pins for the whole repeat, but I like a more stable stack of fabric for later steps.
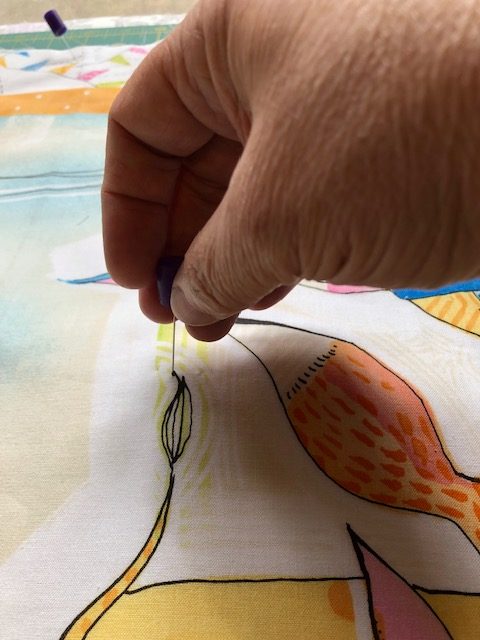
As I worked my way along the panel, I kept poking myself with the pins all pointing upward, then I remembered I had some Pinmoor plastic pin “stoppers”. These little “stoppers” fit on the top of the pin to keep me from being lacerated and to keep the pins from falling out.
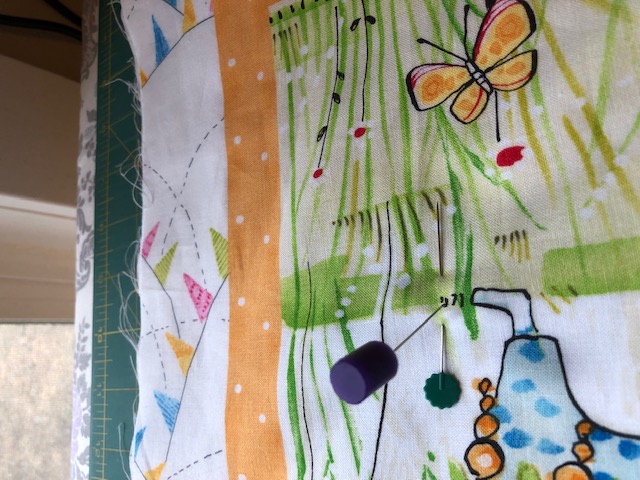
After I had the fabric all lined up, I lifted the fabric holding onto the Pinmoor “stopper” to ensure the fabric would not shift. I used some Flower Pins to anchor the fabrics together. The flower head pins are flat and will allow you to cut your fabric into strips without having your ruler slide around or have to unpin you layers.
Once your layers are all pinned, you get to do some math. Measure the width of your panel along the selvage edge. The book will give some very detailed instructions about how wide to cut your strips. The wider the strip, the larger your block. You will want to think about proportions. I cut my strips 3 ¾”. I was able to get 6 strips from my 23 ½” panel.
As I cut my strips, I made sure to move pins as needed. I also made sure that I wasn’t leaving a large span of fabric unpinned. After working so hard to line the layers up, I didn’t want them shifting during this step.
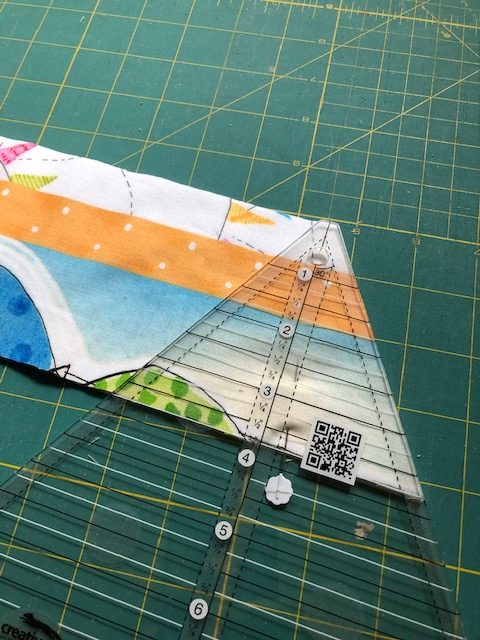
Once the strips were cut, I cut them into equilateral triangles. You can do this with most quilting rulers (60 ˚ marking). I would recommend a specific equilateral triangle ruler. I used a Creative Grids 60˚ Ruler. I liked this ruler because it is designed not to slip, it has measurement markings to accommodate different widths of fabric, and it has a squared off top that helped me as I was sewing the triangles together.
In some One Block Wonders Classes, the instructor says not to look at your kaleidoscope blocks until you sew them together. I am too impatient for that- I am an instant gratification girl. I totally auditioned a few.
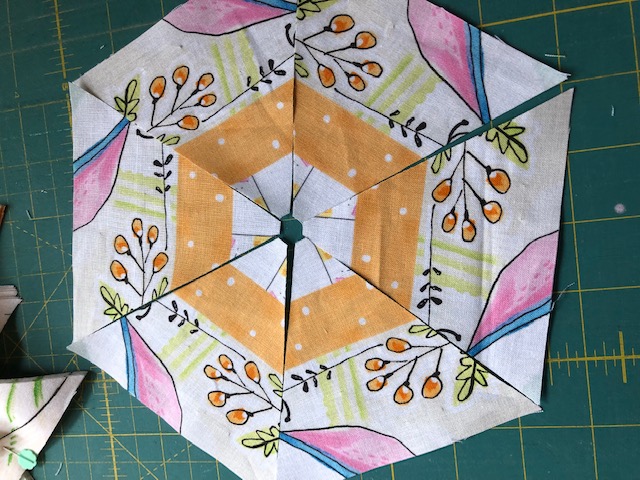
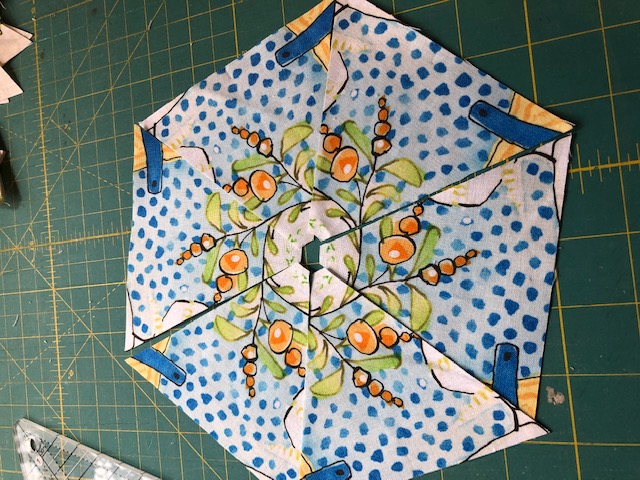
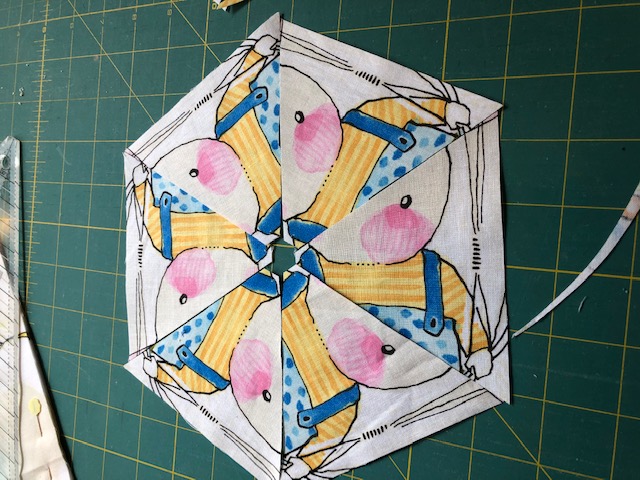
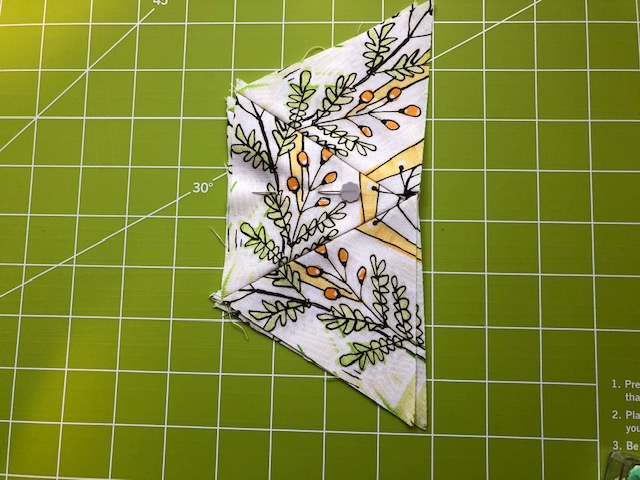
I sewed the triangles together in groups of three. This is important in order to sew the quilt together easily later. If you are a glutton for punishment, tears, and possibly foul language sew all six together (you will become very close with your seam ripper later or sew a bazillion “Y” seams). I matched the flat ends together in the center, pressed the seams all to the left and pinned the two halves together to be ready for the next step.

In part two, I will use a design wall to organize the blocks and then sew them all together.
Happy sewing!
